Check out my portfolio at http://softloverhks.net/. Please give feedback.
4 Jul
linkfinder- My firefox addon
Guys plz check out this https://addons.mozilla.org/en-US/firefox/addon/162085/ . I made this some time back. Please comment on this.
2 Jul
TweetSoft
Hey Guys,
I made this twitter app last week. Do check it out. Here are a few screenshots.
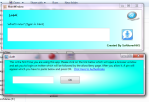
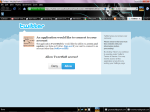
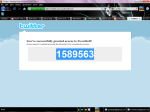


Here is the download link….TweetSoft…..Do check it out 🙂
Just download the zip file and extract it. Then run the setup to install TweetSoft 😉
1 Aug
Guys do check out some of the sites i made
Here are a few links…
http://snsindia.co.in/
http://interiorwala.co.cc/
http://icoalko.co.cc/
http://softloverhks.in/
9 Jun
How to create a mozilla firefox addon?
Basic requirements:
A Windows,mac or linux machine.
A text editor(Notepad++, Textmate, TextEdit etc)
A zip archiver
Basic knowledge of HTML,CSS and Javascript
What is a firefox addon?
A firefox addon is a packages of files that modifies firefox behavior or appearance. It is basically a zip file with a .xpi extension.
What is XUL?
XUL stands for XML User-interface Language. It is similar to HTML and is the building block for a firefox extension. It contains tags like <menu>,<tab> and buttons. For more tags and reference visit https://developer.mozilla.org/en/XUL_Reference .Most the firefox interface is built with XUL.
Lets begin
Step 1: Create a development profile
First create a new profile in firefox(hidden feature of firefox).
In windows ,press windows key+r to open run dialog. In the run dialog, write firefox -p and press enter. Choose create profile and follow the steps.
In Linux, from your terminal navigate to firefox directory and then enter ./firefox -profilemanager. Choose create profile and follow the steps.
In mac OSX, open the terminal and type in /Applications/Firefox.app/Contents/MacOS/firefox -profilemanager. Choose Create Profile in the dialog and follow the steps.
Step 2: Configure you development profile
Open firefox and select your development profile and type about:config in your address bar . Now a warning message will appear about changing settings. Ignore the warning and press I will be careful,I promise.

Now change the following values as shown below:
* javascript.options.showInConsole = true
* nglayout.debug.disable_xul_cache = true
* browser.dom.window.dump.enabled = true

Step 3: Create the folder structure and files
Create a new folder anywhere you like. Name it Firefox Extension. Now inside this folder create this directory hierarchy:

Now create 2 file named chrome.manifest and install.rdf in your Firefox Extension folder.
Step 4: Lets start coding
Lets start with install.rdf. This file basically contains the details about your extension i.e. meta information.
Now add the following code to your install.rdf file
<?xml version=”1.0″?>
<RDF xmlns=”http://www.w3.org/1999/02/22-rdf-syntax-ns#”
xmlns:em=”http://www.mozilla.org/2004/em-rdf#”>
<Description about=”urn:mozilla:install-manifest”>
<em:id>hello@softloverhks.wordpress.com</em:id>
<em:version>1.0</em:version>
<em:iconURL>chrome://hello/content/logo.png </em:iconURL>
<em:name>hello</em:name>
<em:description>
Hello
</em:description>
<em:homepageURL>
https://softloverhks.wordpress.com/
</em:homepageURL>
<em:creator>SoftloverHKS</em:creator>
<!– firefox –>
<em:type>2</em:type>
<em:targetApplication>
<Description>
<em:id>{ec8030f7-c20a-464f-9b0e-13a3a9e97384}</em:id>
<em:minVersion>2.0</em:minVersion>
<em:maxVersion>3.6.*</em:maxVersion>
</Description>
</em:targetApplication>
</Description>
</RDF>
Lets see what these tags mean
<em:id> Here you put your unique developer id (hello@softloverhks.wordpress.com in this case)
<em:version> Here you put in the version of your addon
<em:iconURL> This tells where is the icon for your addon is located
<em:name> here you put the name of your addon
<em:description> addon description should be written within this tag
<em:homepageURL> the homepage for your addon
<em:creator> here you put in your name
<em:optionsURL> This tells the location of options.xul
<em:targetApplication> Here you put in the description of the target application i.e. firefox in this case. The id of the application, the maximum and minimum versions of application supported by the addon etc can be put here.
<em:max version> The maximum version supported is put here
<em:min version> The minimum version supported is put here
To know more about install.rdf visit https://developer.mozilla.org/en/Install_Manifests
Step 5: The Chrome Manifest
It tells Firefox about the contents of the extension(the kinds of files it contains and where they are located). It must be at top level directory of extension directory and i must be named chrome.manifest. It is written in a simple line/space-delimited format.
Now add the following code to your install.manifest file
content hello chrome/content/
content hello chrome/content/ contentaccessible=yes
overlay chrome://browser/content/browser.xul chrome://hello/content/browser.xul
locale hello en-US locale/en-US/
skin hello classic/1.0 skin/
style chrome://global/content/customizeToolbar.xul chrome://hello/skin/skin.css
Now let us see what this means
content hello chrome/content/
This describes the location where your addon files will be found.
content hello chrome/content/ contentaccessible=yes
The function of this is the same as above but when contentaccessible=yes is added, it allows Firefox 3 and later to access the extension’s files and show them in the web browser
overlay chrome://browser/content/browser.xul chrome://hello/content/browser.xul
This is the path from where your browser.xul is loaded i.e. the file which you will use to override the web browsers elements.
locale hello en-US locale/en-US/
This is used for localisation of content
skin hello classic/1.0 skin/
This is the skin reference
style chrome://global/content/customizeToolbar.xul chrome://hello/skin/skin.css
This id the URL of style overlay of your addon.
For more information visit :https://developer.mozilla.org/en/Chrome_Manifest
Step 6: Setting up the chrome folder
Create a new folder content within your chrome folder. Now in content create 2 files and name them browser.xul and hello.js .
Step 7: Designing your addon
This is done by browser.xul. So open browser.xul and add the following code.
<?xml version=”1.0″?>
<?xml-stylesheet href=”chrome://hello/skin/skin.css” type=”text/css”?>
<!DOCTYPE hello SYSTEM “chrome://hello/locale/translations.dtd”>
<overlay id=”sample” xmlns=”http://www.mozilla.org/keymaster/gatekeeper/there.is.only.xul”>
<script src=”hello.js” />
</overlay>
Here we specified where the stylesheet for the addon is present and set a DOCTYPE for localization. overlay tag is used to define the layout of your addon i.e. to add elements to firefox. Here you add element,scripts etc.
Also we inserted the URL of the javascript file we are goin to use.
Now add the following code within your overlay tag.
<menupopup id=”menu_ToolsPopup”>
<menuitem label=”&runhello;” key=”hello-run-key” oncommand=”hello.run()”/>
</menupopup>
<keyset>
<key id=”hello-run-key” modifiers=”accel alt shift” key=”H” oncommand=”hello.run()”/>
</keyset>
Here we inserted a menuitem in the firefox tools menu in the firefox menubar( by using <menupopup> and <menuitems> tag). label defines the name of the menu item and hello.run() function will run when we click on the menu item. We also defined a keyset which will be the shortcut for running the addon(here it is alt+shift+H).
Now add the following code within the overlay tag
<statusbar id=”status-bar”>
<statusbarpanel id=”hello-status-bar-icon” src=”chrome://hello/skin/Untitled-1.png” tooltiptext=”&runhello;” onclick=”hello.run()” />
</statusbar>
The above code tell to insert the icon of the addon to the statusbar whose icon is at chrome://hello/skin/Untitled-1.png and hello.run function will run on clicking it.
The full code for browser.xul is
<?xml version=”1.0″?>
<?xml-stylesheet href=”chrome://hello/skin/skin.css” type=”text/css”?>
<!DOCTYPE hello SYSTEM “chrome://hello/locale/translations.dtd”>
<overlay id=”sample” xmlns=”http://www.mozilla.org/keymaster/gatekeeper/there.is.only.xul”>
<script src=”hello.js” />
<menupopup id=”menu_ToolsPopup”>
<menuitem label=”&runhello;” key=”hello-run-key” oncommand=”hello.run()”/>
</menupopup>
<keyset>
<key id=”hello-run-key” modifiers=”accel alt shift” key=”L” oncommand=”hello.run()”/>
</keyset>
<statusbar id=”status-bar”>
<statusbarpanel id=”hello-status-bar-icon” src=”chrome://hello/skin/Untitled-1.png” tooltiptext=”&runhello;” onclick=”hello.run()” />
</statusbar>
</overlay>
Step 8: Adding functionality
This is done by the javascript file. Now add the following code to your hello.js file
var hello = function () {
var prefManager = Components.classes[“@mozilla.org/preferences-service;1”].getService(Components.interfaces.nsIPrefBranch);
return {
init : function () {
gBrowser.addEventListener(“load”, function () {
var autoRun = prefManager.getBoolPref(“extensions.hello.autorun”);
if (autoRun) {
hello.run();
}
}, false);
},
run : function () {
alert(“Hello! Welcome to ” + content.document.title);
}
};
}();
window.addEventListener(“load”, hello.init, false);
Here when the window loads ,it will run the init method of the hello object. If the preference autorun is set to true, it calls its run method immediately. Otherwise, it will only be called when the menu item , status bar icon is clicked. The variable prefManager connects to Firefox preference manager and gets the autorun preference.
The code in the run method is very simple. It just gets the page title and displays it in an alert box.
In the init methos there is something called gBrowser which is a reference to the current browser.
Step 9: Setting up defaults folder
In the defaults folder create a new folder names preference. Inside preference create a new file and name it pref.js.
Now add the following code to it.
pref(“extensions.hello.autorun”, false);
Step 10: Setting up locale folder
This folder is used for localization. Inside this create a new folder name en-US. Now create a new file named translations.dtd ,which contains translations for entities used in XUL files. Now add the following code to it.
<!ENTITY runhello “Run Hello”>
Step 11: Giving your addon some look(adding CSS)
Now create a new css file named skin.css within the skin folder. Add the following code to it
#hello-status-bar-icon {
list-style-image: url(“chrome://hello/skin/Untitled-1.png”);
width: 83px;
margin: 0 5px;
}
Also add a logo(image file) to the skin folder( i have named is untitled-1.png). Finally add a logo to your chrome/content folder.
Step 12: Packing and distributing.
Now select all your files and folders within the Firefox Extensions folder and create a zip archive using any of the archieving tools. Rename it to ff.xpi. Now open this file in firefox and install the extension. Restart and you will see a icon in your status bar. Click on it and you will see the title of the page in the alert box.

There are two options of distributing your extension. Either use addons.mozilla.org or host it yourself. If you do it yourself, you can specify an updateURL in your install.rdf file, but note that since Firefox 3 it has to be a secure location, e.g. through SSL or similar.
For more information about mozilla extension dev visit http://developer.mozilla.org/
That is it. We have created our first firefox addon. :)
13 May
How to get disk drives info using C#
In this tutorial i am going to show you how to retrieve information about the various disk drives in your sytem.
#So open visual studio 2008 and create a new windows application. (I have named it as HDD)
#Now add a label and a combo box. Change their properties as follows:
For combo box change name to combHDD
Change the name oth the label to SdriveLabel
#You could also add a menu strip and add controls to it as you want. I have added File and Help menu items.
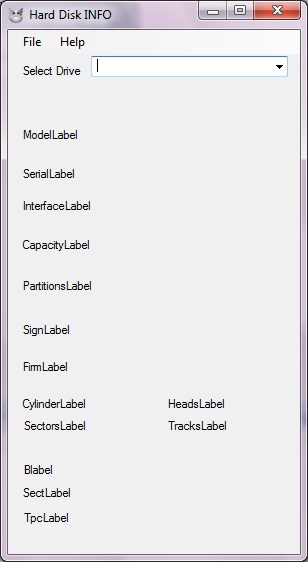
#Now add 14 more labels and change the name properties to the following values:
ModelLabel
SerialLabel
InterfaceLabel
CapacityLabel
PartitionsLabel
SignLabel
FirmLabel
CylinderLabel
SectorsLabel
Blabel
SectLabel
TpcLabel
HeadsLabel
TracksLabel
#Now arrange the label as in the figure
#Now double click on the form and add the followind code to Form1_Load event
ManagementObjectSearcher mosDisks = new ManagementObjectSearcher(“SELECT * FROM Win32_DiskDrive”);
foreach (ManagementObject moDisk in mosDisks.Get())
{
combHDD.Items.Add(moDisk[“Model”].ToString());
}
This searches for win32 disk drives on your system and adds them to the combo box.
#Also add this at the top of your code
using System.Management;
#Now from your form view, double click on combo box and add the following code to combHDD_SelectedIndexChanged event
ManagementObjectSearcher mosDisks = new ManagementObjectSearcher(“SELECT * FROM Win32_DiskDrive WHERE Model = ‘” + combHDD.SelectedItem + “‘”);
foreach (ManagementObject moDisk in mosDisks.Get())
{
TypeLabel.Text = “Type: ” + moDisk[“MediaType”].ToString();
ModelLabel.Text = “Model: ” + moDisk[“Model”].ToString();
InterfaceLabel.Text = “Interface: ” + moDisk[“InterfaceType”].ToString();
CapacityLabel.Text = “Capacity: ” + moDisk[“Size”].ToString() + ” bytes (” + Math.Round(((((double)Convert.ToDouble(moDisk[“Size”]) / 1024) / 1024) / 1024), 2) + ” GB)”;
PartitionsLabel.Text = “Partitions: ” + moDisk[“Partitions”].ToString();
SignLabel.Text = “Signature: ” + moDisk[“Signature”].ToString();
CylinderLabel.Text = “Cylinders: ” + moDisk[“TotalCylinders”].ToString();
SectorsLabel.Text = “Sectors: ” + moDisk[“TotalSectors”].ToString();
HeadsLabel.Text = “Heads: ” + moDisk[“TotalHeads”].ToString();
TracksLabel.Text = “Tracks: ” + moDisk[“TotalTracks”].ToString();
Blabel.Text = “Bytes per Sector: ” + moDisk[“BytesPerSector”].ToString();
SectLabel.Text = “Sectors per Track: ” + moDisk[“SectorsPerTrack”].ToString();
TpcLabel.Text = “Tracks per Cylinder: ” + moDisk[“TracksPerCylinder”].ToString();
}
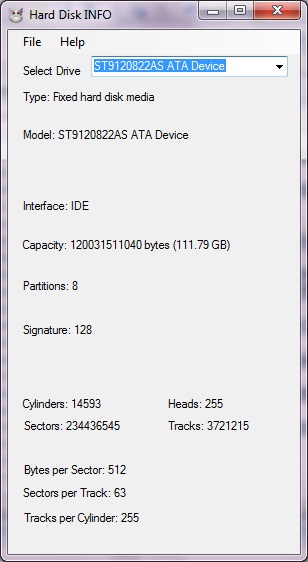
This selects the drive selected and displays all the properties of it(in 14 labels) using ManagementObjectSearcher class.
#Now press f5 to run your application. Select a drive and you will see something as follows
16 Apr
How to make your application speak…using microsoft’s speech object library in C#
Open VS2008…
# Create new windows form project (I have named it talker here).
# Now right click on your Project(Talker in this case) and select add reference.
# Now under COM select Microsoft Speech Object Library and press Ok.

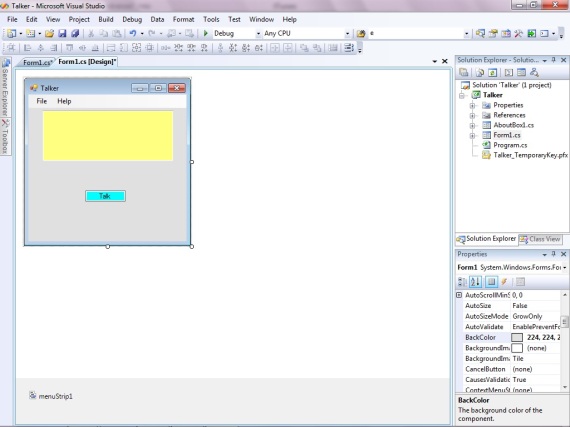
#Now in your win form add 1 menu strip,1 text box and 1 Button(change text property to Talk).
# Now in the menu strip add 2 menus File and Help.Under file add exit.
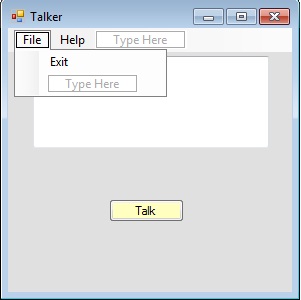
# Now in the properties of TextBox change the MultiLine property to true.
# Now your form should look somewhat like this.
# Lets add functionality to our form.
# Double click on exit menu in your menu strip.
Now add the following code in the click event handler.
this.Close();
# Now add this at the top of your code
using SpeechLib;
# Now double click on the Talk button in your design. Add the following code
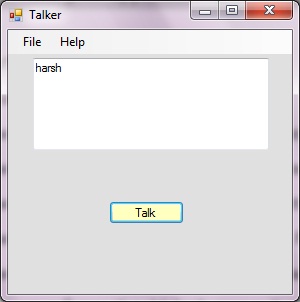
SpVoice voice = new SpVoice(); voice.Speak(textBox1.Text,SpeechVoiceSpeakFlags.SVSFDefault);
# You can add anything you like in the Help menu strip. item. I have added the following
MessageBox.Show(“Just enter the text and press talk”);
# Now press F5 and enter any text and press talk. You will hear your system speaking out the text you entered.
Download the source files here
22 Mar
Beginning with asp.net
In this tutorial i am going to show you how to create a web form and pass values from one page to another using query strings. So lets get started:
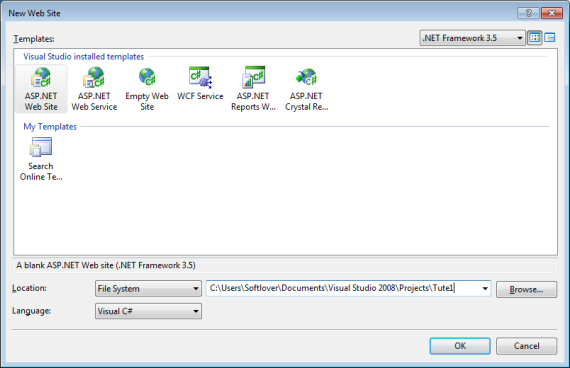
# Open Visual Studio 2008.
# Open file->new website. Now Click browse .Select local file system and at an appropriate location create a website Tute1 and choose language as C# as shown below:
# Now in the solution explorer you will see Default.aspx . Open it and switch to the design view.
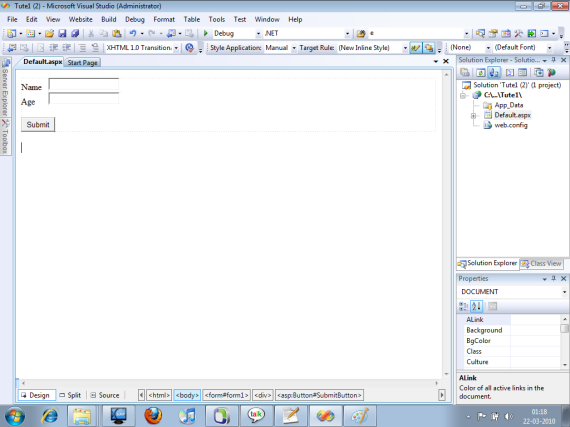
# Add 2 textboxes and 2 labels from the toolbar
# Select first label and change the following properties in the properties window:
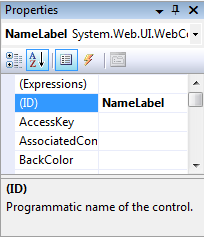
Text : Name
Id: NameLabel
# Now Select second label and change the following properties:
Text: Age
Id: AgeLabel
# Similarly select the 2 TextBoxes and change there Id’s to NameTextBox and AgeTextBox respectively.
# Now add a button to the form and in the properties window change it’s Id to SubmitButton and Text to Submit.
# Arrange them so that it looks something like this.
# Now double click on the submit button . This opens up the code behind file for you. Now in SubmitButton_Click function add the following code
string name = NameTextBox.Text;
string age = AgeTextBox.Text;
Response.Redirect(“~//Page2.apx?name=” + name + “&&age=” + age);
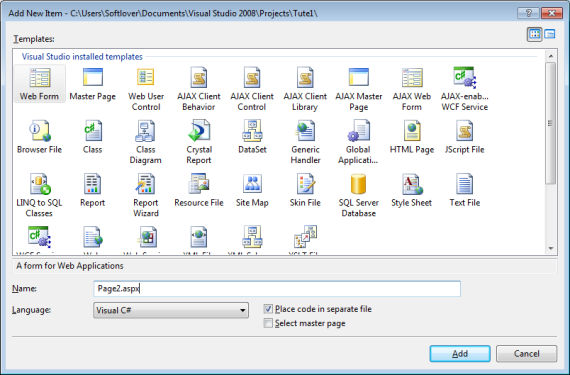
# Now go to solution explorer and right click on the website to aad a new item.Select a webform and name it Page2.aspx
# Now in page2 add two labels and change their Ids to NameLabel and AgeLabel respectively.
# Now double click on the the form. This opens up Page_Load method of Page2.
# Now add the following Code
NameLabel.Text = Request.QueryString[“name”].ToString();
AgeLabel.Text = Request.QueryString[“age”].ToString();
# Now run the default.aspx by pressing CTRL+F5. Enter Name and age.
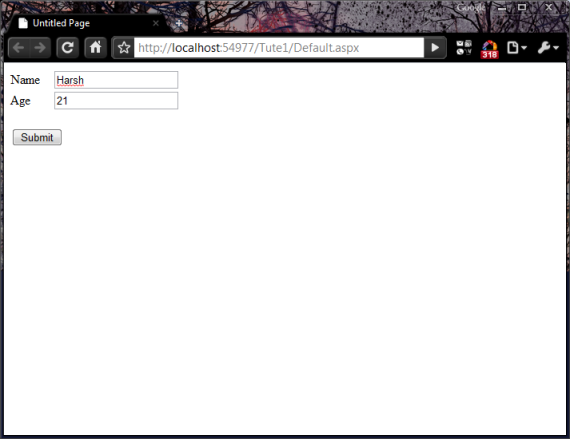
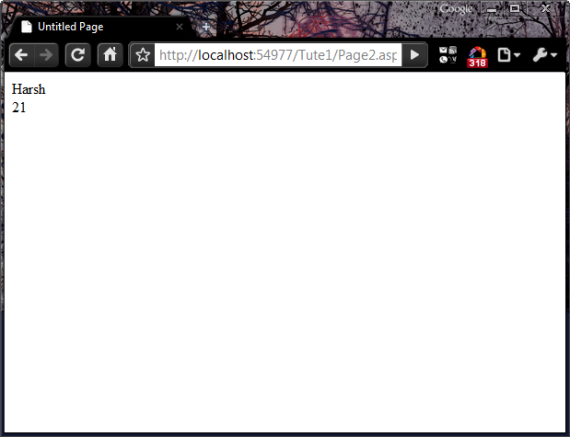
# Press submit.
# Now you see that Page 2 shows you the name and age.
Click here to download source files
22 Feb
Getting started with rails and scaffolding
In this tutorial, i will show you how to install ruby on rails on windows and creating ur first application in rails.
First of all go to http://rubyforge.org/frs/?group_id=167 and download the one click ruby installer. I am using version 1.8.6 here. Run the downloaded file and follow the following steps as shown in figure:
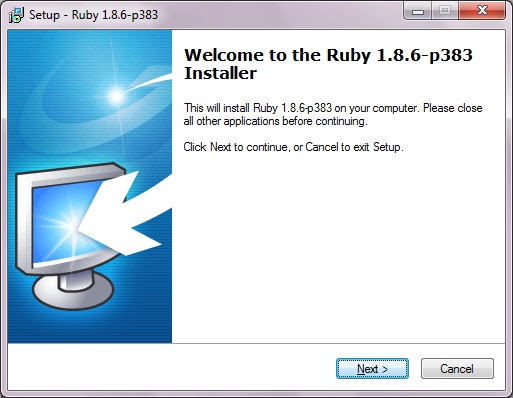
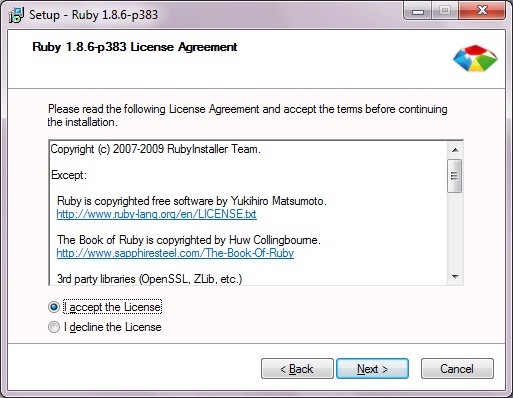
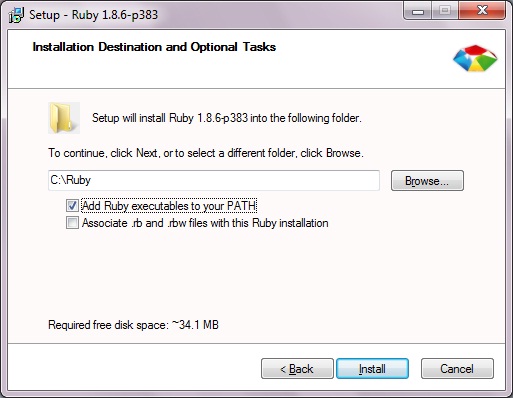
Press install and this will install both ruby and ruby gems.
Now time to install a database engine.we will use SQLite 3 here ( though you can use any other database but you have to change database.yml in your application. We will come to that later).
Download the SQLite Command Line Tool and SQLite dll from http://www.sqlite.org/download.html
unzip both the file files .Open the ruby installation folder ( Default “c:\ruby\” ) and inside the bin directory paste both the extracted files.
Now time to install rails, go to start menu and open ruby>>start command prompt with rails. This will open up a command prompt. In the command prompt type
>gem install rails
This will take awhile, so go get a snack. It may even look like it’s not doing anything at first, so don’t worry that it’s hanging. This will install all the code, test code, ri documentation, and RDoc documentation for Rails.
Now time to install database driver. In the same command prompt type:
>gem install sqlite3-ruby
This will install the sqlite ruby driver.
Now time to test installtion. Open the command prompt and navigate to the directory where u want to keep your app. Then type
>rails myapp
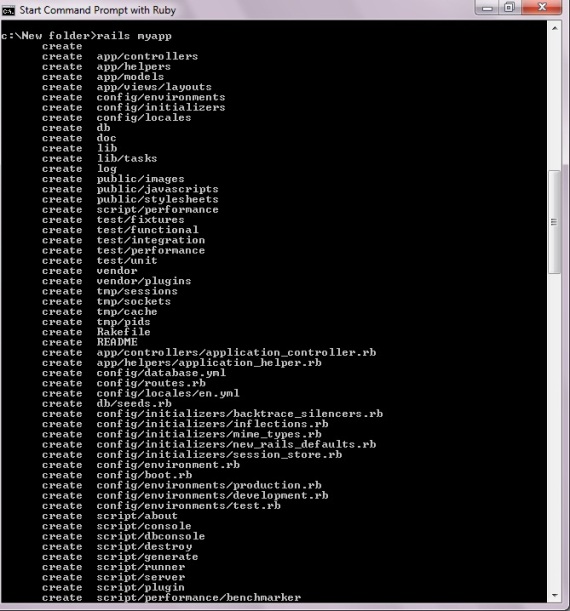
This will create a directory named myapp which contains your application.
Now the command prompt type
>cd myapp
>ruby script/server
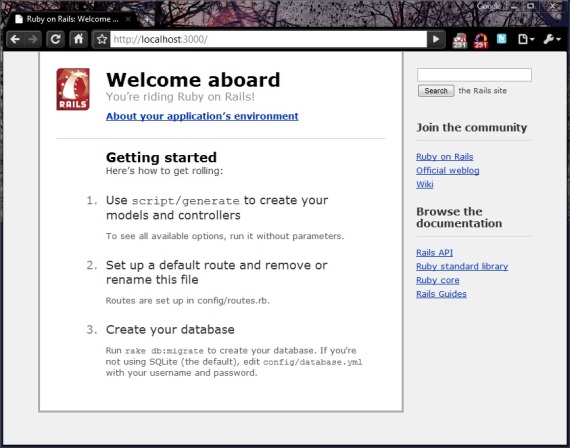
Now open your browser and go to http://localhost:3000. You will see the following page
Now close the server by pressing ctrl+c
We have sucessfully installed and tested rails installation. Time to create a application. So in the same command promt type:
>ruby script/generate scaffold student name:string age:integer description:string
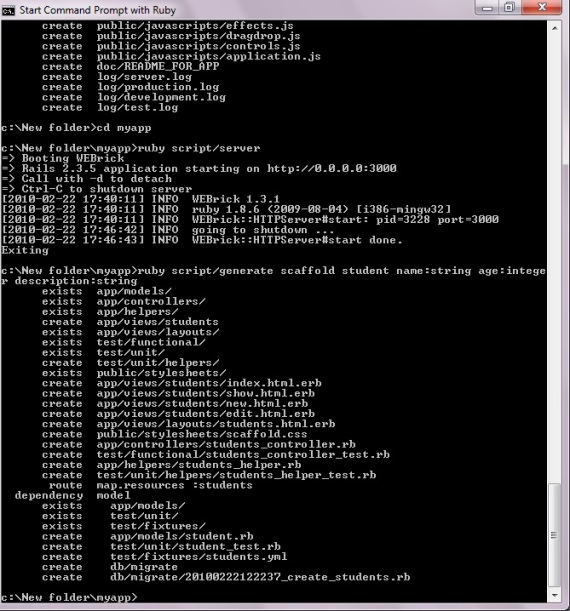
This will create a bunch of files for you. Actually we have created create,read,update and destroy (CRUD) pages for a table student having name,age and description. But, this does not make changes to the database so we have create the student table in the database engine. This is easily done by rails with a simple command, so type
>rake db:migrate
This creates the above table in the database engine.
Now in the command prompt type:
>ruby script/server
Open your web browser and type localhost:3000/students
You will see the following :
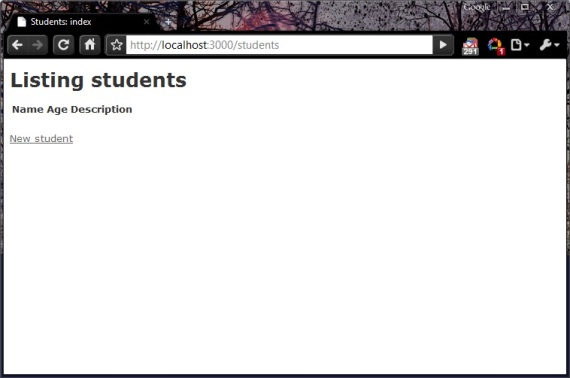
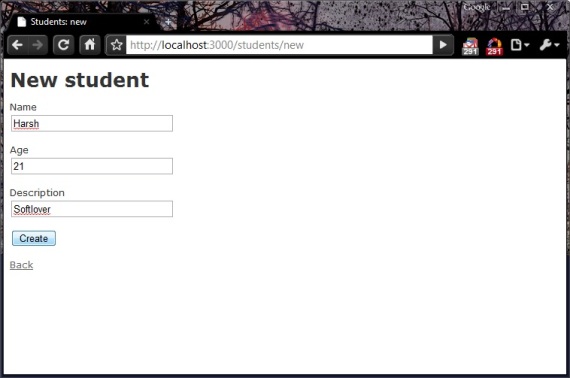
Go ahead any create students.

You can also edit delete and view the list of students.
We have successfully created our first rails application.
20 Feb
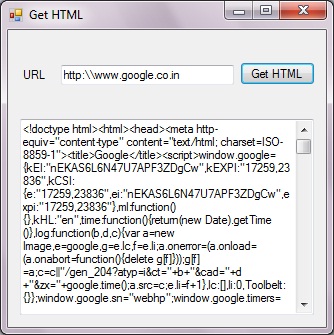
How to retrieve a websites source code (HTML) using C#
When i asked my friend about what should i write for my first C# tutorial, he told me to start with installation n all. But i didn’t like it as installation tuturial are found everywhere. I was thinking what should i write that is simple but still interesting than those hello world programs. I was looking at my old works(probably 1 to 1.5 years old) when i found out this getHTML app.
So, lets begin(remember this application requires an internet connection)
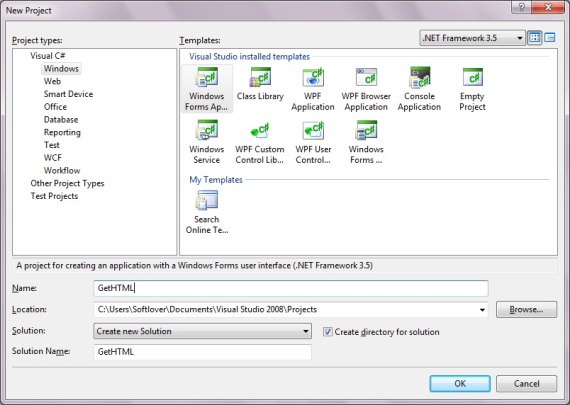
=>Open Visual Studio 2008, Select File->New->Project. Under visual C# tab select windows forms application and name the project GetHTML as shown in figure.
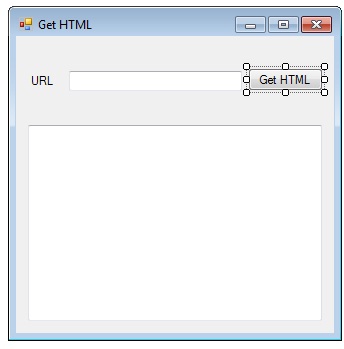
=>A form designer will open. From the toolbox tab drag and drop a button ,2 textboxes and a label on to the form.
=>Select the button and open it’s properties(by right clicking).In the properties tab change the following properties the given values
Name:GetHTMLButton
Text:Get HTML
=>Now select the label and change the following properties
Name:URLLabel
Text:URL
=>Then select a text box and change it’s properties to
Name:URLTextBox
=>Then select the other text box and change it’s properties to
Name:HTMLTextBox
Multiline:true
Scrollbars:vertical
=>Now arrange them as shown in figure
=> Now in the designer double click on the GetHTMLButton
This will open up the code and will create a GetHTMLButton_Click event handler.
Now go to the top of the code and add these 2 lines:
using System.IO;
using System.Net;
=>Now in the GetHTMLButton_Click method add the following code:
WebRequest req = WebRequest.Create(URLTextBox.Text);
WebResponse resp = req.GetResponse();
StreamReader read = new StreamReader(resp.GetResponseStream(), Encoding.ASCII);
HTMLTextBox.Text = read.ReadToEnd();
Here we are using the System.Net.WebRequest and System.Net.WebResponse classes to send and recieve request from the URL entered by the user. Then we use the Sysyem.IO.StreamReader class object to read the response recieved and display it in HTMLTextBox.
Now run the program or press CTRL+F5
Enter a URL in the URLTextBox and wait for few seconds, the HTMLTextBox will show you the entire HTML content